

DIY Leaf Chocolate Mold: Vacuum Forming with FORMART S
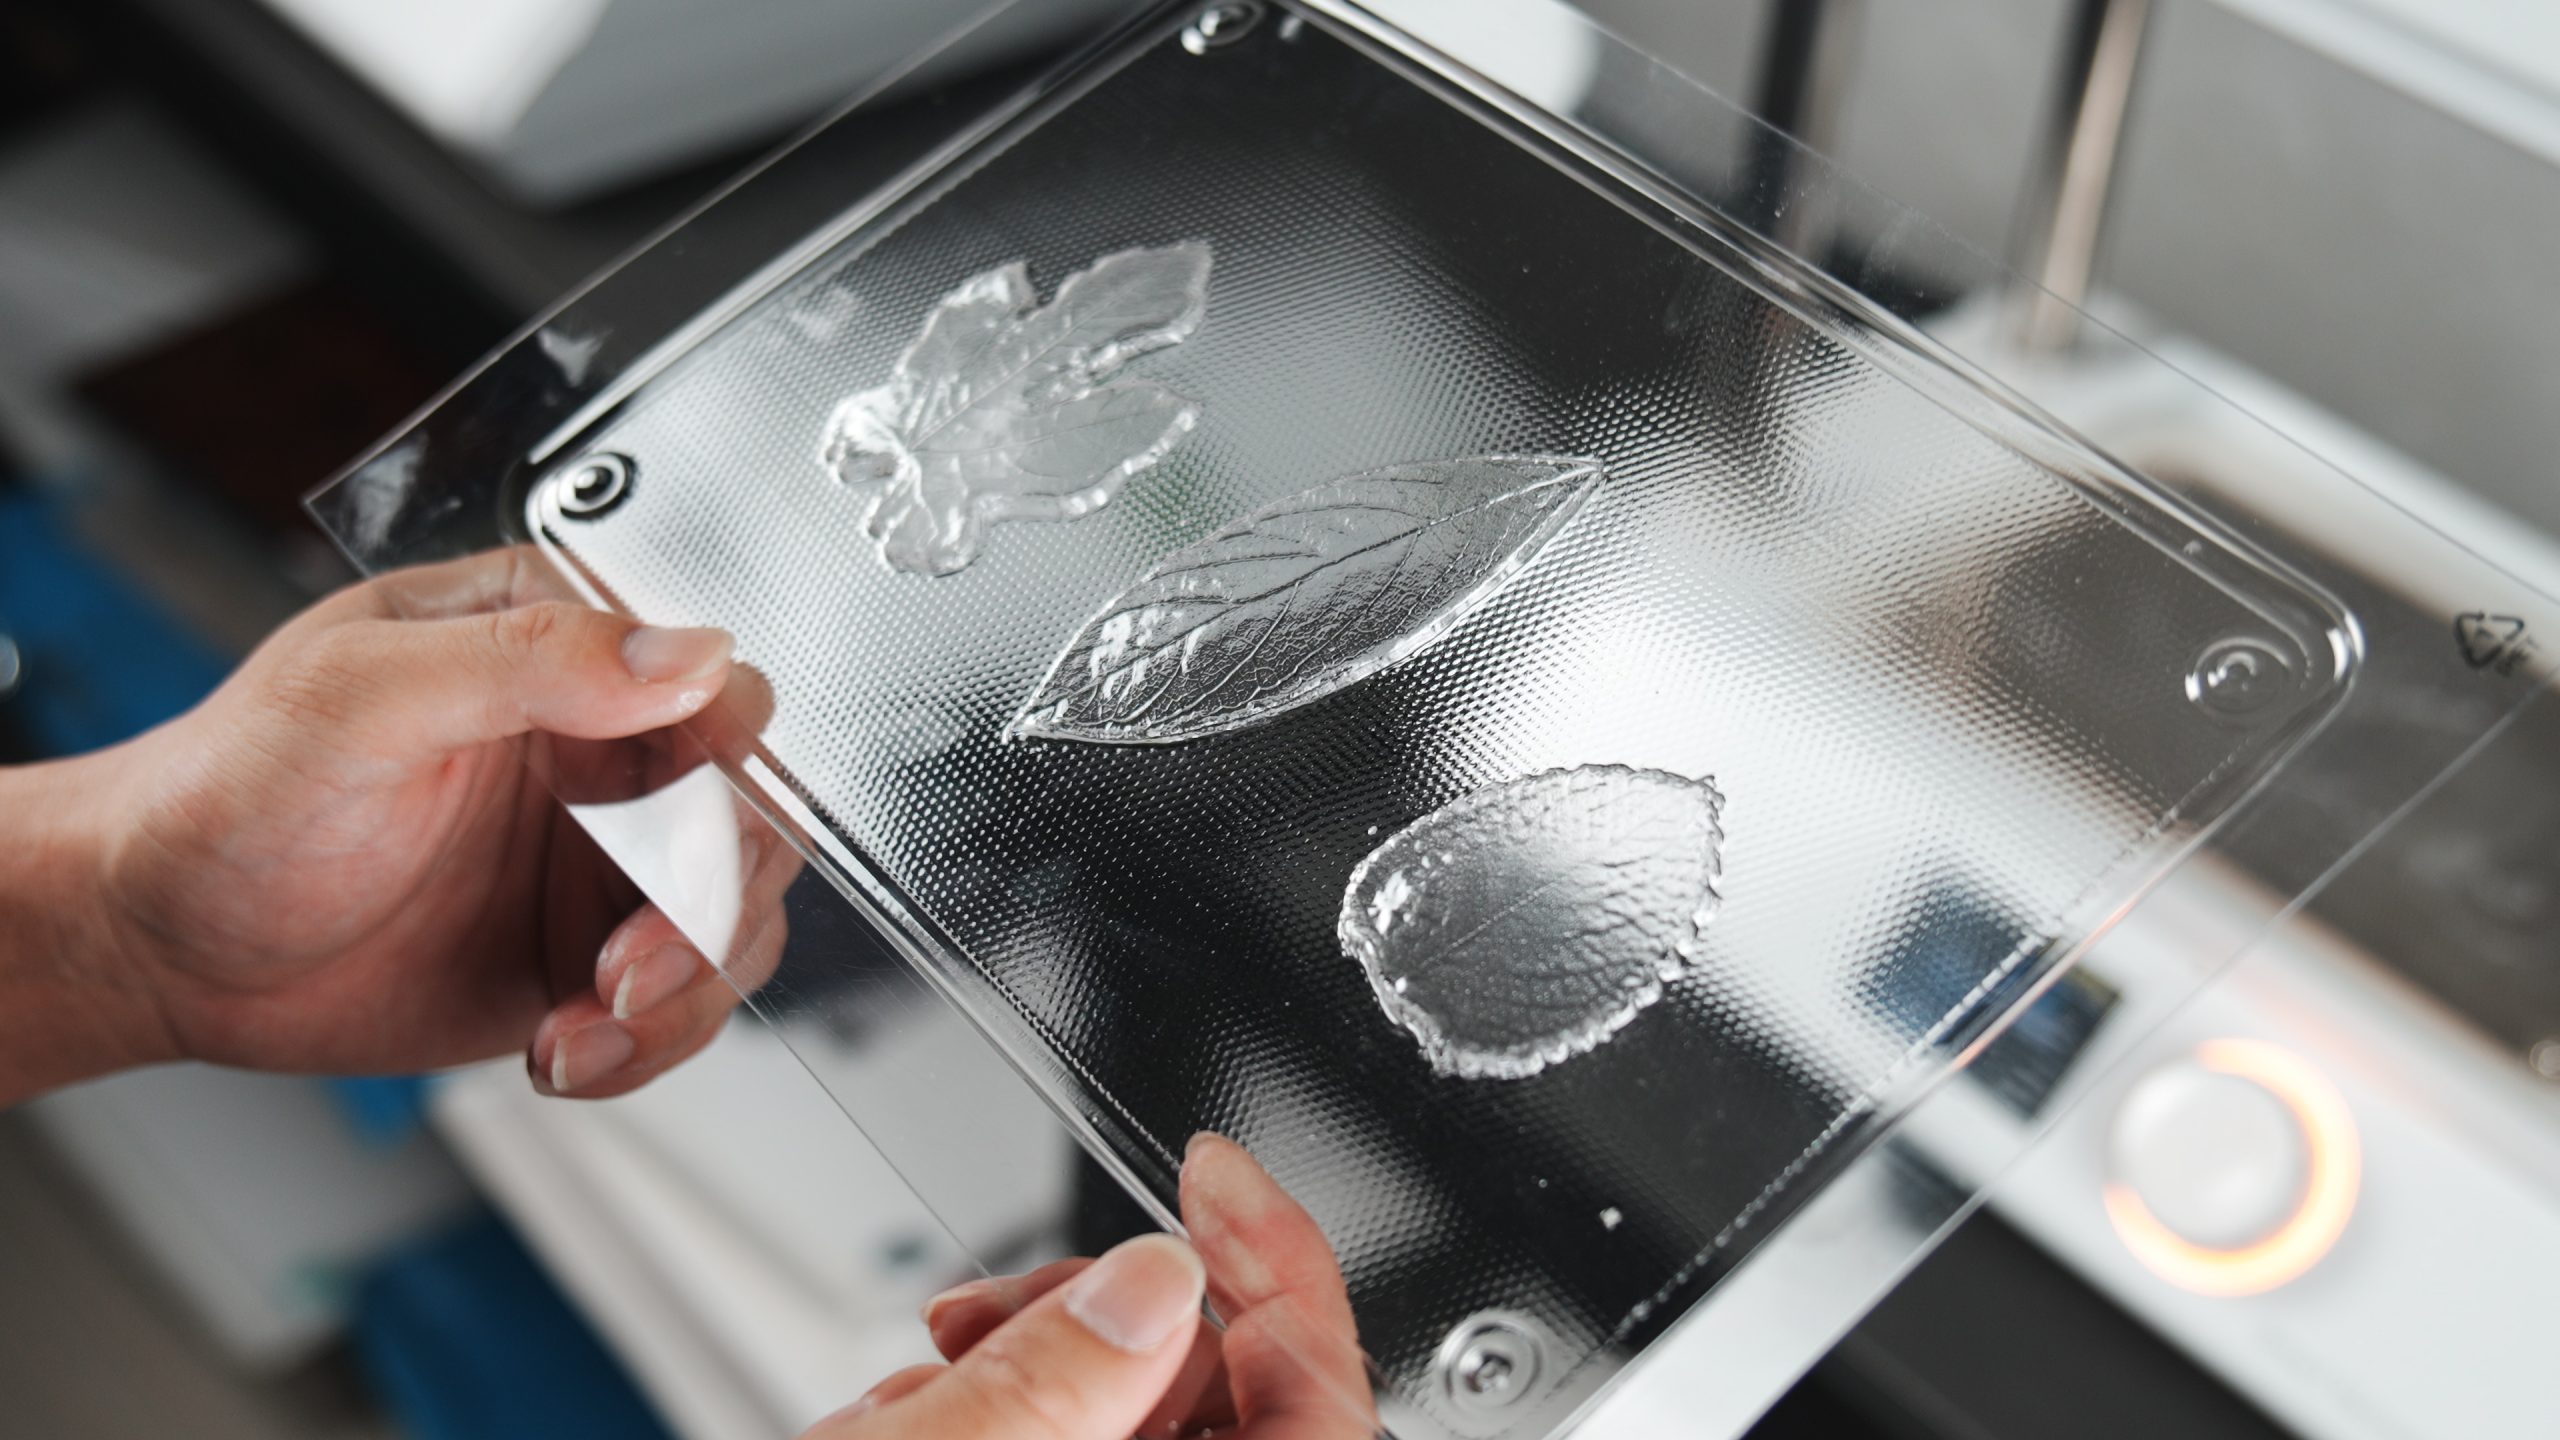
A leaf chocolate mold starts with a real leaf and a paper clay master. Use FORMART S to vacuum form a suitable plastic sheet over the master, capturing the leaf outline and vein texture. This guide covers four making steps, PET and LDPE sheet selection, demolding, and checks before food use.
Everyday objects can inspire custom molds. In this project, paper clay adds depth and support to a thin leaf, creating a master for vacuum forming. The formed plastic becomes the mold you can later fill. Before using it for chocolate, confirm that the specific sheet is suitable for the intended food contact and operating conditions.
Watch the leaf mold vacuum forming demonstration
How a Leaf Becomes a Vacuum Forming Master
Vacuum forming heats a thermoplastic sheet until it softens. A difference in air pressure then draws the sheet against a master. After cooling, the plastic retains the transferred shape. As a result, the master’s surface and geometry affect the finished mold.
A leaf provides a natural outline and vein pattern. Paper clay supports it and adds the depth needed for a usable cavity. The leaf and clay are the master; the formed plastic is the mold. Keeping that distinction clear helps you plan both the forming process and later casting.
Why a Leaf Chocolate Mold Needs a Paper Clay Master
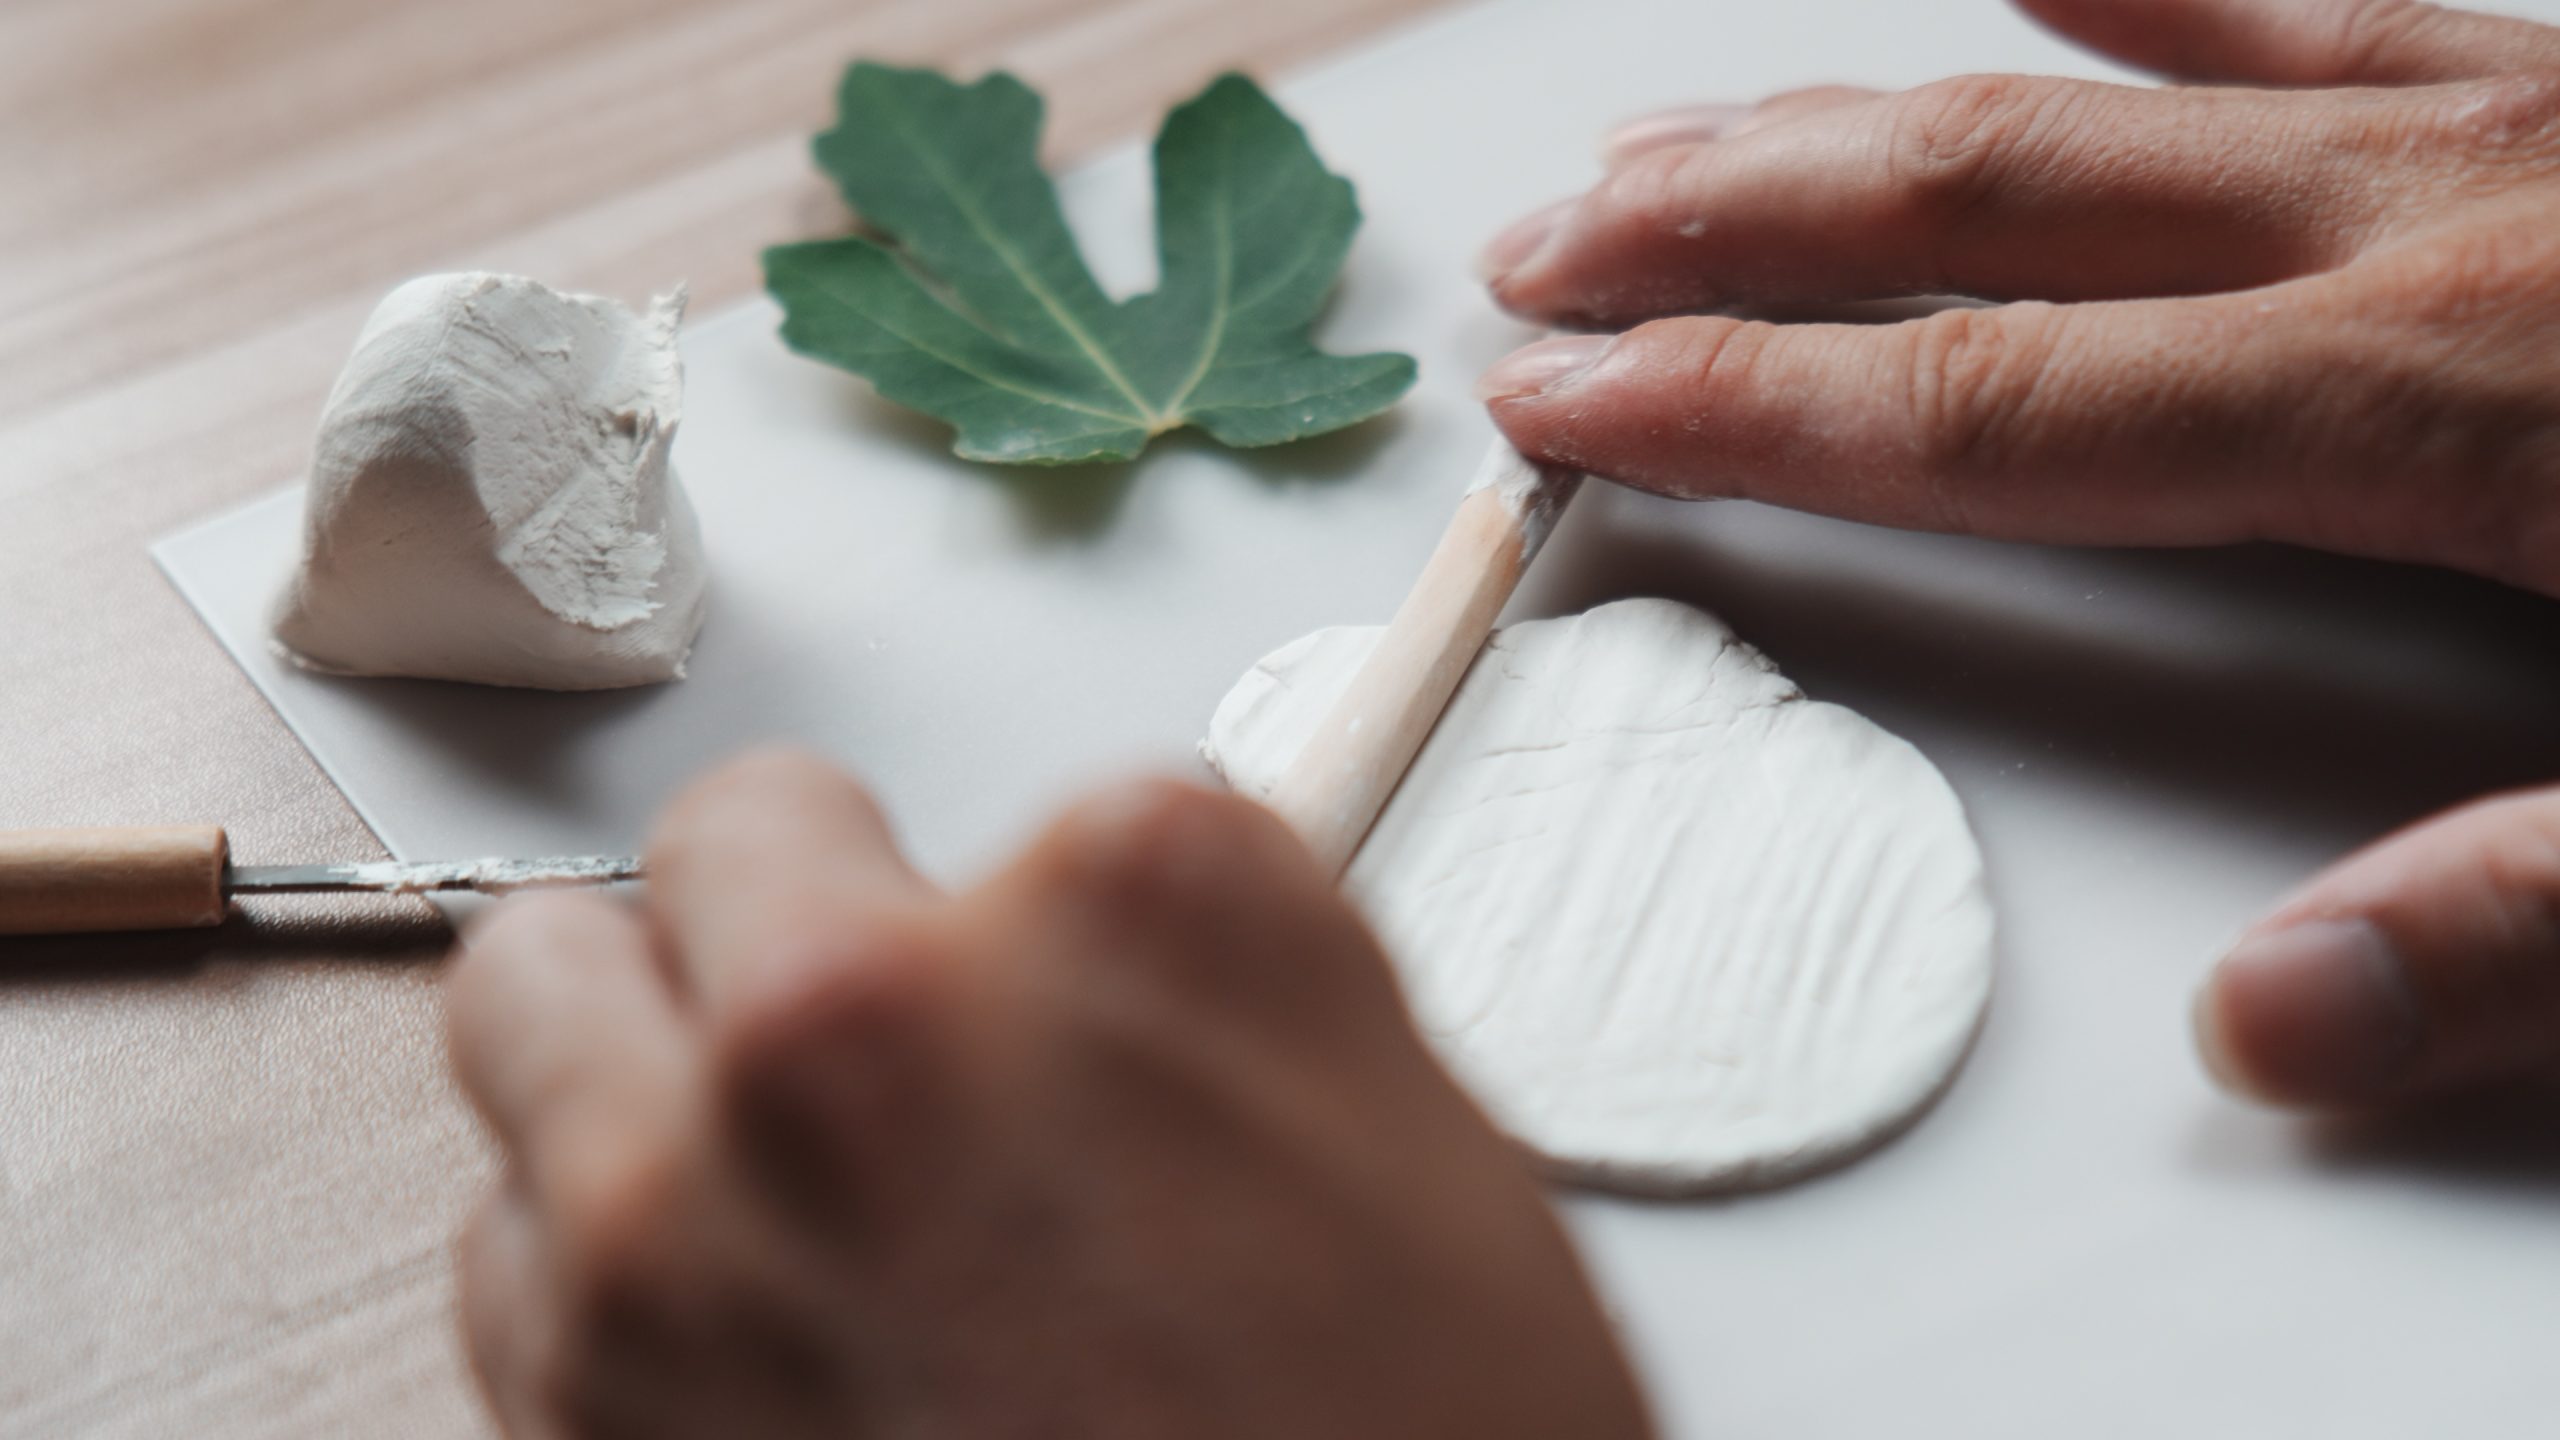
A leaf alone is usually too thin to create much cavity depth. Paper clay gives the master thickness and helps support its shape during forming.
- Add depth: Build up the master to create space for the material you plan to pour.
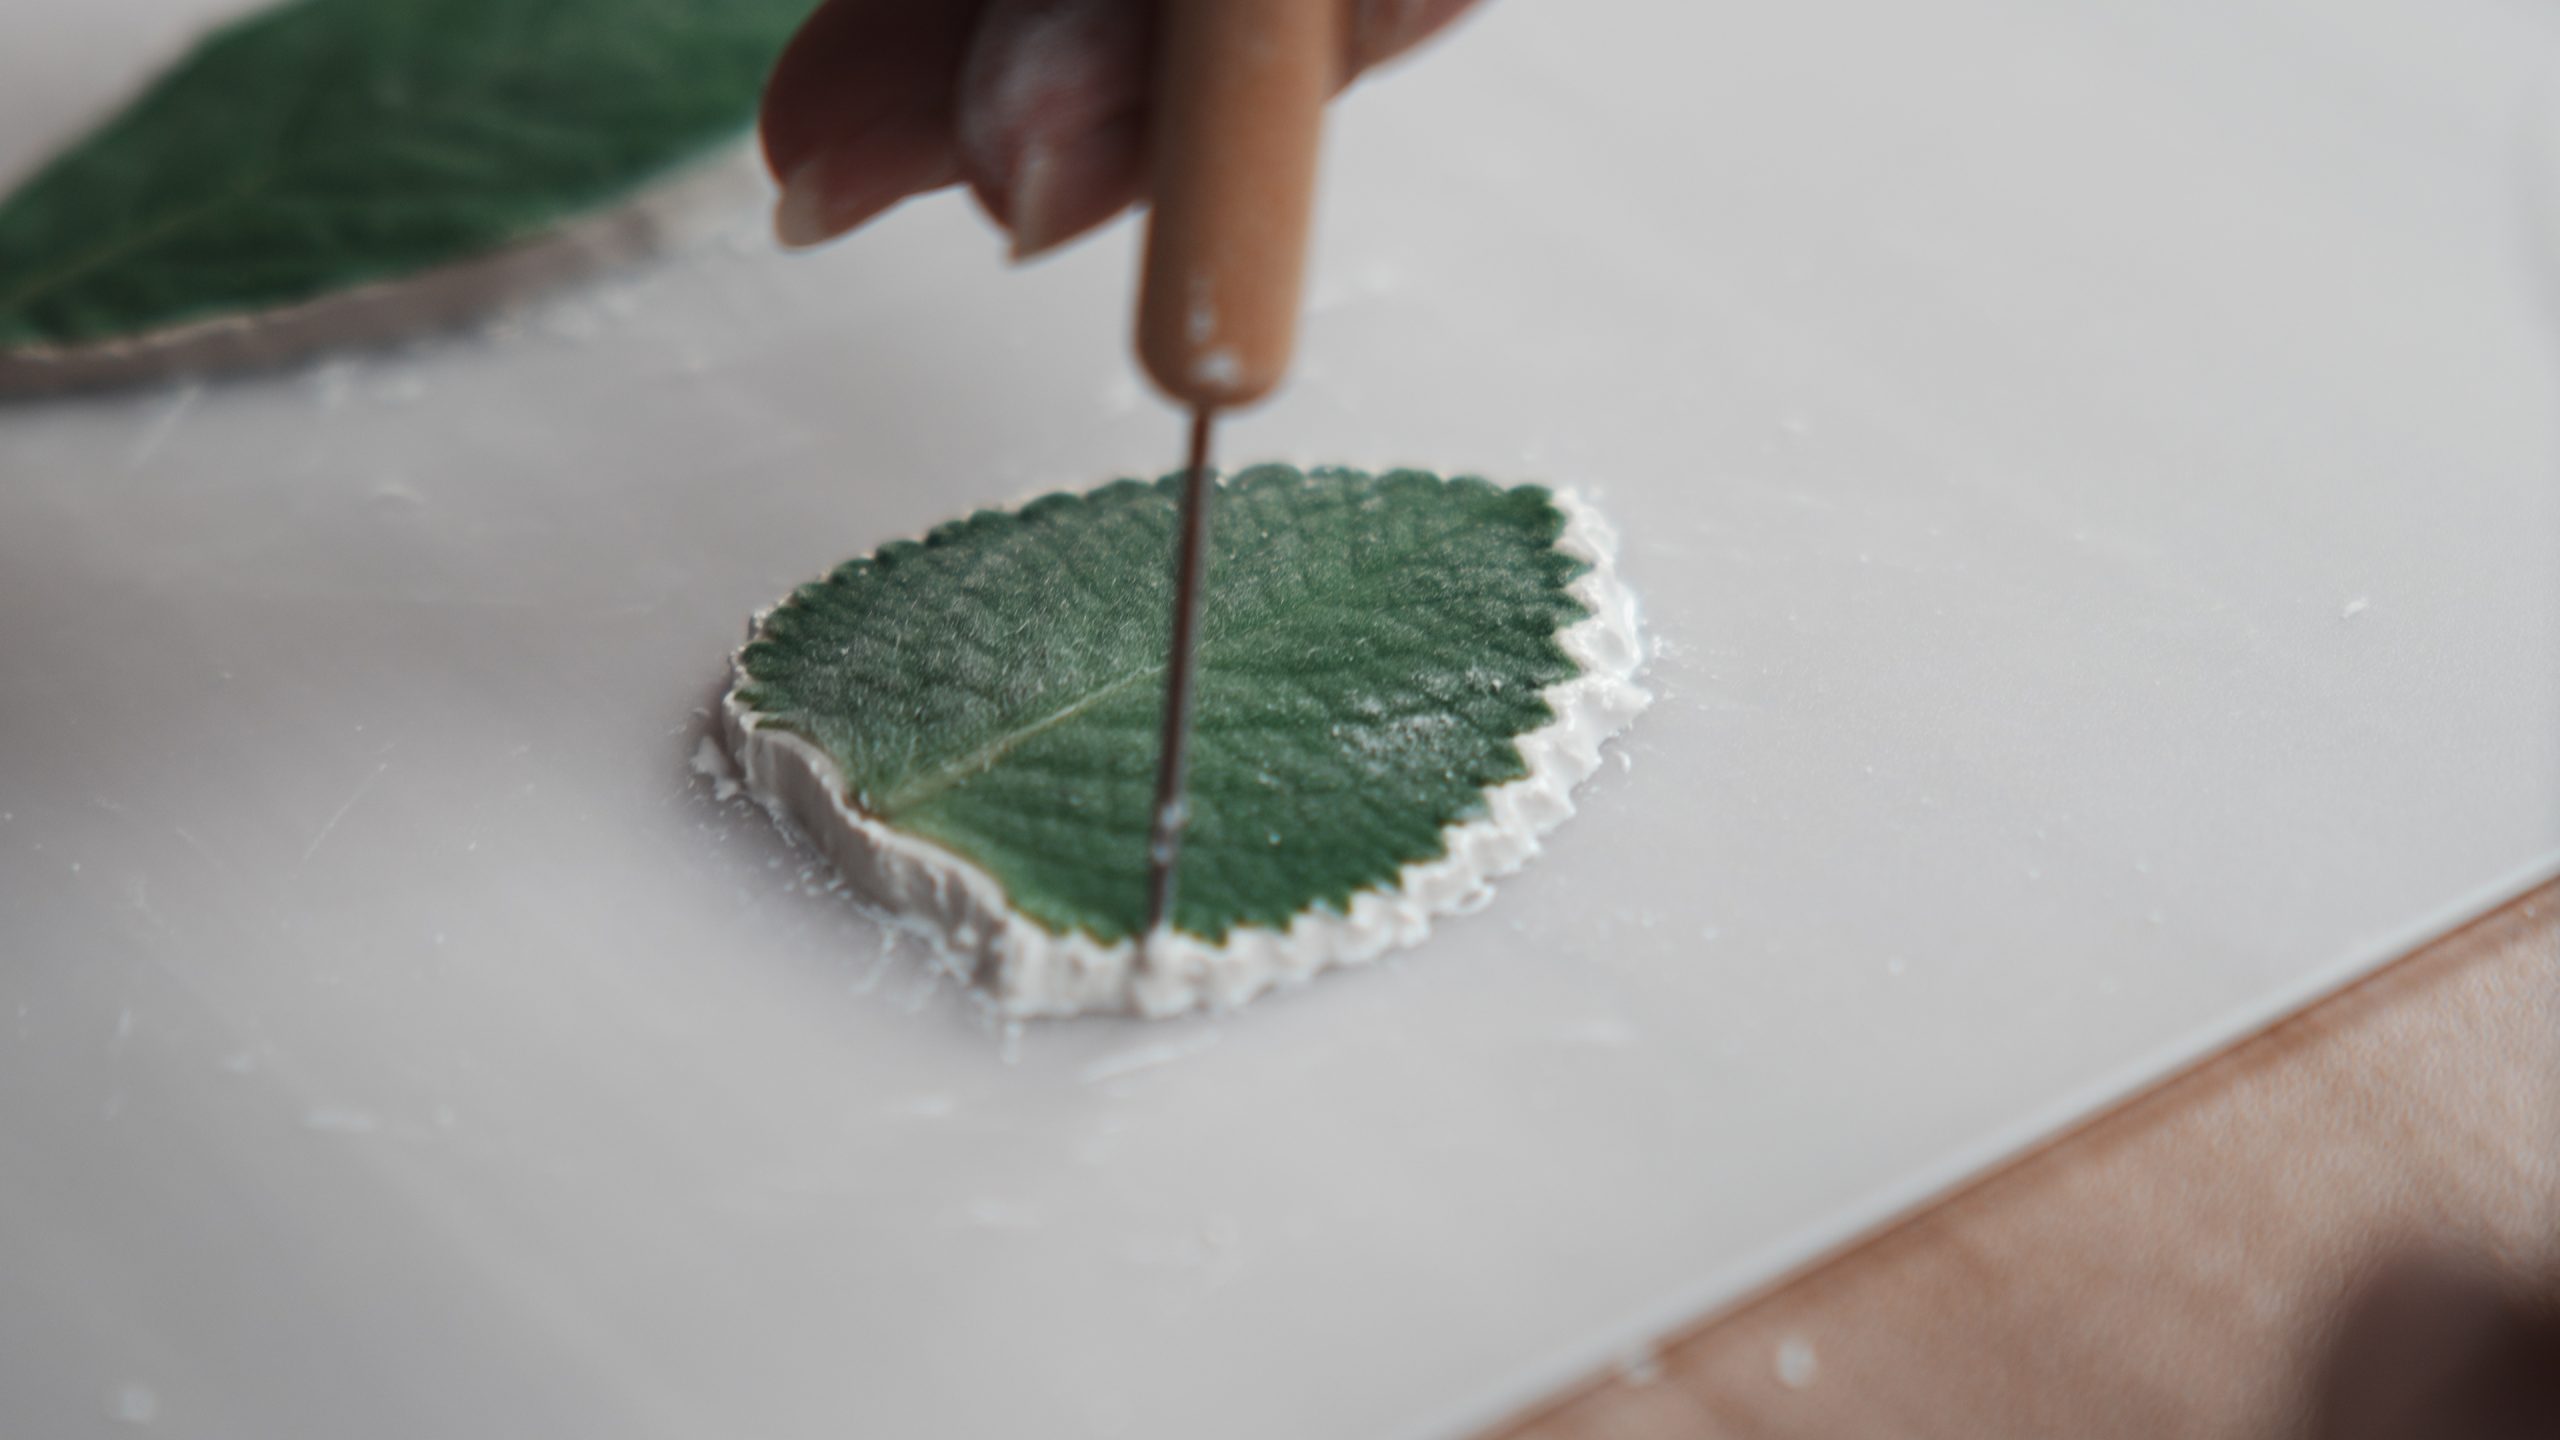
- Support the leaf: Keep the thin leaf stable and shape it into the intended profile.
- Preserve the veins: Leave the surface you want to reproduce exposed.
Follow the clay manufacturer’s drying instructions before forming. Also check that the complete master, including the leaf and any fixing materials, is appropriate for the forming heat. Prepare its thickness, curves, and surface carefully before loading the machine.
Make a Leaf Chocolate Mold in Four Steps
1. Choose a leaf with visible veins
Select an intact leaf with a distinct outline and raised vein texture. Remove loose dirt and debris. For a first attempt, a simple shape with limited curling is easier to prepare and support.
2. Add paper clay for thickness and support
Combine the leaf with paper clay to make a three-dimensional master. Consider the cavity depth you want, while keeping the vein surface visible. Trim excess clay, then allow it to dry according to the product instructions.
3. Vacuum form the sheet with FORMART S
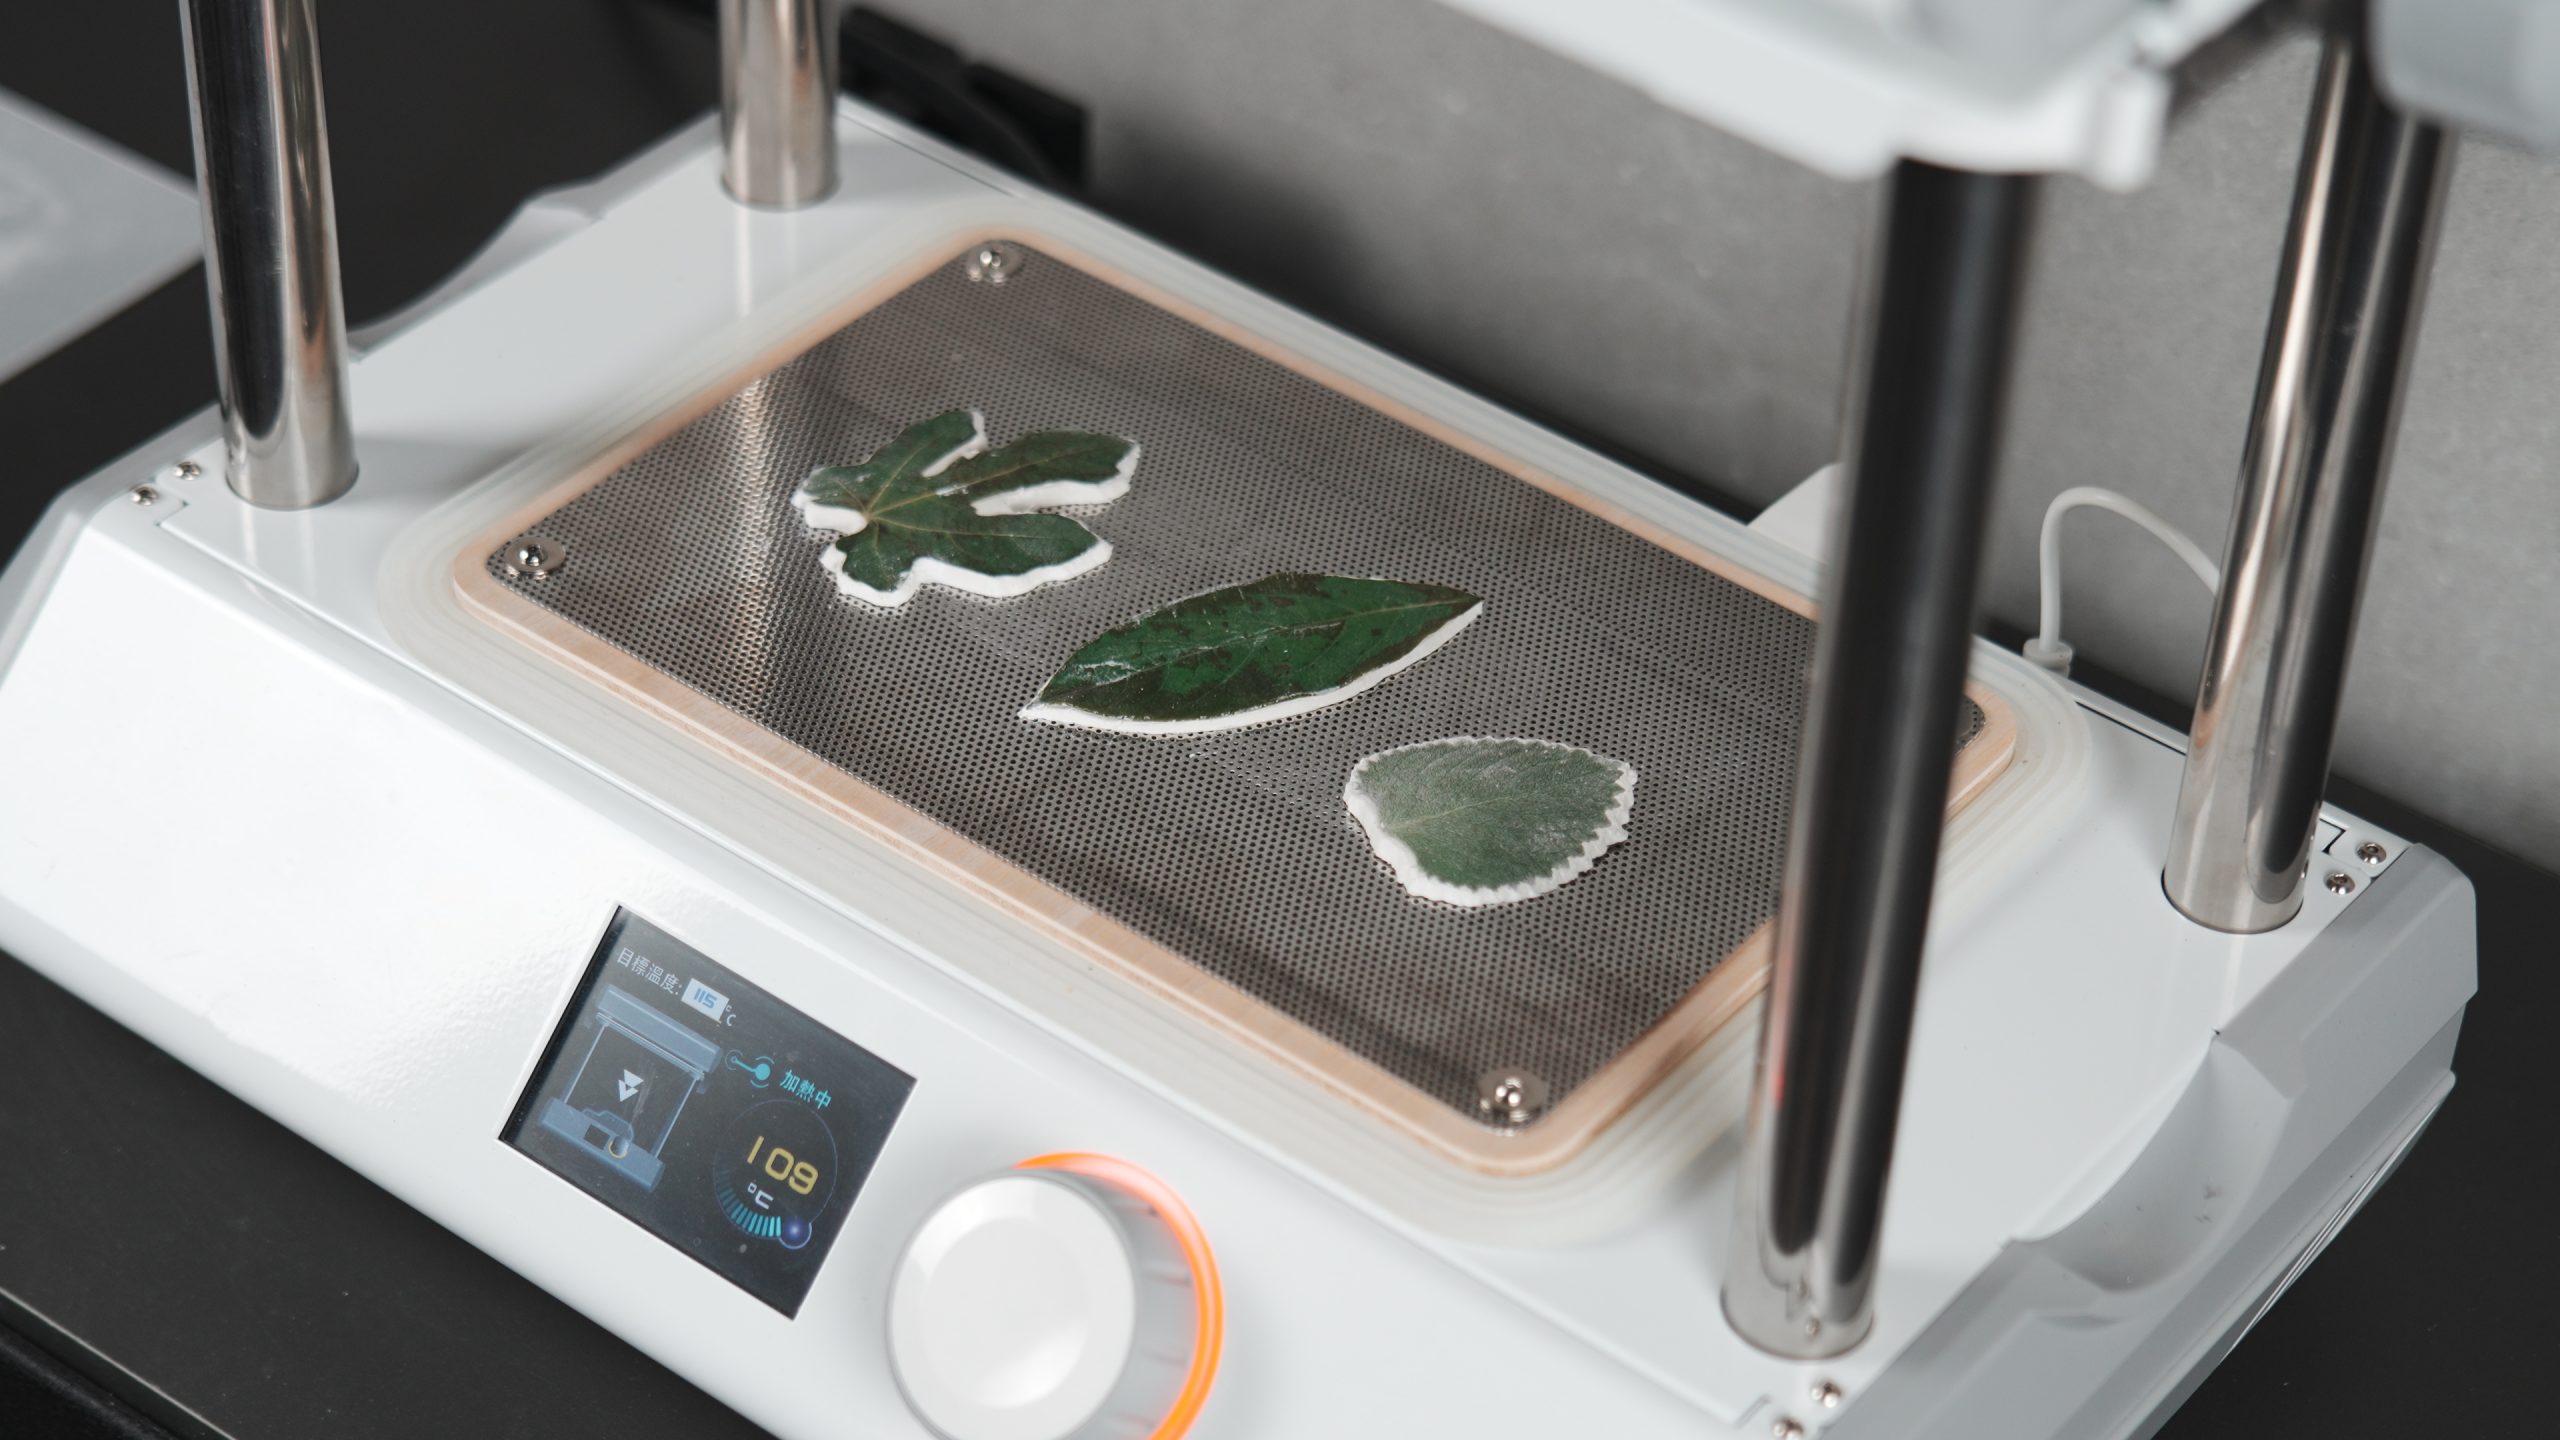
Arrange the master on the forming platform. Choose PET or LDPE sheet that suits the machine and your intended use. Heat the sheet and vacuum form it against the master. Settings vary with the sheet material, thickness, and master geometry, so follow the equipment and material instructions.
4. Cool, release, and trim the mold
Let the formed sheet cool before removing the master. Cut away excess plastic while leaving a practical handling edge. Finally, check for tears, sharp edges, and any master residue. The finished cavity carries the leaf outline and surface detail.
PET or LDPE for Your Leaf Chocolate Mold?
Compare visibility, flexibility, and release behavior when choosing a sheet. The table below describes general tendencies. Actual properties depend on the specific product, thickness, and formulation.
| Comparison | PET sheet | LDPE sheet |
|---|---|---|
| Appearance | Often clear, making the cavity easier to inspect | Often translucent; check the product specification |
| Feel | Generally firmer | Generally softer and more flexible |
| During use | Helps you see the cavity and filling process | Can offer flexibility when releasing a casting |
| Selection checks | Consider cavity depth and ease of release | Consider flexibility and support during filling |
| Food use | Confirm the actual sheet’s food-contact suitability and use limits | Confirm the actual sheet’s food-contact suitability and use limits |
Material names alone do not determine the right choice. Evaluate the finished shape, the way you will remove the chocolate, and the supplier’s stated conditions. Sheet thickness also affects stiffness and handling.
Explore MYYARD vacuum forming equipment and sheets
Preparing to Capture Leaf Veins with FORMART S
This project uses FORMART S to transfer the master’s outline and leaf texture into a plastic sheet. The detail you achieve depends on the original veins, master preparation, sheet thickness, and forming conditions.
- A leaf with a clear outline and vein pattern
- Paper clay for thickness and support
- A FORMART S Smart Vacuum Former
- PET or LDPE sheet suitable for the intended use
- Scissors or suitable trimming tools
Start with a small trial. Check the transferred texture and how easily the master releases. Then use those results to refine the master or sheet choice for your next attempt.
Before Using Your Leaf Chocolate Mold for Food
After forming and trimming, confirm the actual sheet’s suitability for food use. Clean and inspect the mold before filling it.
- Choose a sheet whose product information supports the intended contact with chocolate.
- Keep pouring and handling temperatures within the sheet supplier’s specified limits.
- Check for tears, sharp cut edges, and remaining master material.
- Reserve food molds for food. Do not share them with resin, plaster, or other non-food materials.
PET and LDPE are material names, not a guarantee that every sheet is suitable for food use. Follow the specific product information and supplier guidance. Confirm your planned temperatures and use conditions before pouring chocolate.
Other Ways to Use a Leaf-Shaped Mold
A leaf-shaped cavity can also inspire other projects, provided the mold is compatible with the material you intend to cast. Check material compatibility and temperature limits before use.
- Craft casting: Reproduce leaf shapes in suitable non-food materials.
- Seasonal decorations: Create ornaments based on natural outlines.
- Hands-on learning: Connect plant observation with master making and vacuum forming.
Different leaves provide different contours and textures. Keep molds for food separate from those used for non-food projects.
Two Keys to a Useful DIY Chocolate Mold
Focus on master preparation and sheet selection. Support the leaf, create the required depth, and preserve the texture you want to copy. Next, choose a sheet that matches the shape, release method, and intended conditions of use.
A small trial can reveal whether the cavity needs a different depth or whether a different sheet would be easier to handle. Learn more about FORMART S and explore the possibilities of making a custom mold from a natural object.
Further Reading: Diamond-Shaped Chocolate Molds
For a different approach to custom chocolate molds, explore our diamond-shaped chocolate project. It uses a 3D-printed master with vacuum forming to create both the mold and matching packaging. Comparing a natural leaf master with a printed master can help you plan your next design.
Read the diamond chocolate mold and packaging tutorial (Traditional Chinese)

No Comments